Showing posts with label recipe. Show all posts

Monday, January 9, 2012

Salted Caramel Sauce

Earlier this year, I had surgery to remove my wisdom teeth. I decided not to have the anesthesia since it costs more, and let's just say that if I had to do it over again... drug me up! Maybe I am a wimp, but it was HORRIBLE. I decided I would rather go through labor again. (Although, I am sure that if I were actually in labor, I would be thinking I'd rather have the wisdom tooth extraction.)
Anyway, while I was laid up in bed, I realized that we had the cooking channel for free that week. WOOHOO! I caught an episode of Kelsey Nixon's show called "Kelsey's Essentials", and she made salted caramel sauce. And even though I was in pain, throwing up, and bleeding.. I still wanted to make salted caramel sauce. SO, I finally did! I used her recipe as a base, and made a couple of changes. (More salt and butter....what?! In my defense, the butter that I bought came in 4 TBSP sections, so I was lazy and threw it all in.) Had I known how easy this really was, or how delicious, I would have made it sooner.
I've been adding a bit to my coffee in the morning, with a splash of creamer. It takes the place of sugar...just tastier! You can do whatever you want to with this. It makes a great topper for ice cream or cheesecake, or whatever your heart desires! :)

Salted Caramel Sauce

INGREDIENTS
1 cup sugar
1/4 cup water
3/4 cup heavy cream
4 tablespoons unsalted butter
1-1/4 teaspoons kosher salt

DIRECTIONS
In a saucepan, combine the sugar and water. Bring the mixture to a slow boil without stirring.(While your sugar mixture is on the stove get all of your other ingredients measured and ready to add.) Continue to boil the sugar water (about 5-6 minutes) until it reaches an amber color. Remove mixture from heat and carefully whisk in the heavy cream. The mixture will harden for a few seconds and bubble up, but continue to whisk until everything is smooth. Stir in the butter and salt. Transfer to a mason jar and enjoy!

Friday, October 28, 2011

It's all about the Oven!

Not many things in the kitchen surprise me anymore, but I had NO IDEA you could make tons of grilled cheese sandwiches all at once...in the oven! Who knew? It seems like such a simple idea, yet I never thought of it. Trust me, I have wasted PLENTY of time standing over a skillet, making one grilled cheese after another, only to find that by the time they are all done, the first one is cold!
I went to my mom's house last night, and she made them in the oven..all at once. She works at an school, and learned this trick from the lunch ladies. (And I believe the lunch ladies have all of the answers!! :))
Here is how you do it:
1. Preheat your oven to 450 degrees.
2. Assemble your grilled cheese sandwiches like you normally would, buttering the sides of the bread facing the outside. (Mom used one and a half slices of American Cheese in hers, and they were perfect.)
3. Place on a cookie sheet and bake for about 6 minutes.
4. Take them out and flip them over and bake for an additional 2-3 minutes, until they are done.

Now, you didn't stand over a stove for forever, and all of the sandwiches are ready to serve at once, and noone has to get stuck with the cold one! A revolution in sandwich making! :) So simple.

I also wanted to share a new Christmas gift idea--Personalized Casserole Dishes! :) I can make these with pretty much any design and any name. Aren't they cute?? Thank you Pinterest! (I am totally addicted to that website, but who isn't???) I am charging $30 for a 9x13, and $25 for a 9x9. (Including covers). I will ship for an additional $7.
Front
Back
These are oven safe and permanently etched! So you don't have to worry about any designs rubbing off with oven use, etc. Now you can take those dishes to your potluck, and KNOW you will get your dish back!
To order: Go to my Etsy store http://www.etsy.com/listing/84867209/glass-etched-casserole-dish or you can send me a message at amber_barber@suddenlink.net

**AMBER**

Monday, October 10, 2011

Crock-pot Buffalo Chicken

I found a recipe that I really like: Crock-pot Buffalo Chicken. It's super easy and you can eat it lots of different ways including: Buffalo Chicken Sandwiches, Buffalo Chicken baked potatoes, Buffalo chicken nachos, etc. I also used some of the leftovers to make a Buffalo Chicken dip that was fabulous!
Here is the rundown. Place your frozen chicken breasts in a crock-pot, sprinkle with dry ranch dressing mix, and pour on 1/2 a bottle of Frank's Red Hot Wing Sauce. (I used a whole bottle, according to the recipe, and decided that 1/2 would have been sufficient and not as soupy.)
Cook on Low for 8 hours and shred.
Serve it up however you want! I have included the recipe for the Buffalo Chicken Dip, which turned out great!

Crock-pot Buffalo Chicken

INGREDIENTS:
4-6 Frozen chicken breasts
1 pkg. Dry Ranch Dressing mix
1/2 bottle of Frank's Red Hot Wing Sauce

DIRECTIONS:
Place all in crock-pot and cook on low for 8-hours


Buffalo Chicken Dip
INGREDIENTS:
1 C. of prepared Crock-pot Buffalo Chicken (See recipe)
2 pkgs. cream cheese, softened
1/2 C. green onions, chopped
1 tsp. Lawry's Seasoned Salt
1 C. Sharp Cheddar

DIRECTIONS:
1. Mix chicken, cream cheese, green onions, and seasoned salt in a bowl.
2. Spray a shallow baking dish, such as a pie plate, with non-stick cooking spray.
3. Pour mixture into the dish and top with the cheddar cheese.
4. Bake at 350 degrees for about 20 minutes, until cheese is hot and bubbly.

Monday, September 26, 2011

Donuts vs. Doughnuts

So it all started with a quick trip into a local antique shop called The Huckleberry. They had TONS of great finds, and what did I come home with?? A donut cutter!! (I snagged some cookie cutters that I am planning on using today as well.) But of course, since I bought the donut cutter, I had to make donuts, otherwise it wouldn't have been a needed purchase, and I assure you, at the time, I felt like I "needed" the donut cutter.

(And just as a side note: Is it Donut or Doughnut? Well, I spent all of my energy making these things, so I am going for the simpler spelling.. you know, to save energy. That's my story, and I'm sticking to it. Apparently my spell check is okay with either)

Let's just say... we don't pay our local donut shop enough. I mean this was a long process! I was thinking, "I will NEVER make donuts again! Sheesh!"...until I tasted one, and OH MY GOODNESS! There is nothing like a fresh homemade donut and a cup of coffee! I decided that I wanted to get out my family china to eat them on, especially since this donut required so much effort!

(This china was passed down to me from my mother, who got this as a wedding present from my Dad's Aunt Lilo. She bought it in Bavaria, Germany, which is where my grandmother if from, so this set is special to me. :))

Rolling the donuts in sugar was apparently not enough sweetness--I had to make up for with my cup of cream and sugar..with a little coffee added. :) And yes, I did eat off of my fancy china while sitting outside on an old rickety picnic table..which I happen to like, even if it does look like it should go in the trash. Don't worry, I hammered all of the nails down so they wouldn't snag my jeans.

I used a Brown Butter glaze for these and I thought they were YUM!

And who can resist this?? I made half with a cinnamon sugar coating and the other half with a Brown Butter Glaze.

Here is the recipe if you are feeling like a baker today! I promise, it was a lot of steps, but SO worth the end result!

BASIC RAISED DOUGH
INGREDIENTS:
•3 Tbsp. active dry yeast, divided
•1 C. milk, heated to 110 degrees F, divided
•2 to 2-1/2 C. bread flour, divided
•2 tablespoons sugar
•1 tsp. vanilla extract
•3 egg yolks
•1/2 stick of butter
•vegetable oil for frying
1. In a medium bowl, dissolve 2 tbsp. of yeast into 3/4 c. of heated milk (110 degrees). Add 3/4 C. four and stir until it is like a paste. Cover and let rest in a warm spot for 30-minutes.
2. Combine the remaining yeast and milk in the bowl of your stand mixer. Add the rested flour/yeast mixture, sugar, salt, vanilla, and egg yolks. Mix until smooth. Turn off the mixer and add flour, 1/2-cup at a time, until your dough starts to pull away from the sides of the bowl and is no longer sticky. Cover with plastic wrap and refrigerate for at least an hour, and up to 12-hours.
3.Line a baking sheet with a non-terry dish towel and dust it with some flour. Roll out the dough on a floured surface to 1/2 thick. Cut out with a donut cutter, or a cookie cutter.
4. Place the donuts on a baking sheet at least 1-inch apart and cover with plastic wrap. Let the dough proof anywhere from 5-20 minutes, until the dough springs back slowly when you touch it with your finger.
5. Put about 2-inches of oil in a large pot. (I used a large cast-iron skillet). The donuts will rise to the top, so don't worry with trying to cover them with oil. Cook on one side about 1-2 minutes and then flip and cook the other side.
6. Remove and drain on a rack over a paper towel until cooled.
7. Glaze the donuts or coat them in sugar/cinnamon mixture.

BROWN BUTTER GLAZE
INGREDIENTS:
•3 Tbsp. butter
•1-1/2 C. powdered sugar
•1 to 2 tbsp. milk
1. Cook butter in a pan on the stove top over medium heat until the solids in the butter separate and begin to brown. Remove from Heat immediately.
2. Place all ingredients into a mixing bowl and whisk together until smooth.

Recipes adapted from Doughnuts by Lara Ferroni

Monday, August 29, 2011

Crockpot Spaghetti Casserole

This dish is not rocket science. It uses pre-cooked, store bought ingredients which makes it perfect for all of those busy moms out there struggling with time issues. Not that I am one of those moms. Ever. We are always on time, and I always make extravagant suppers with all organic, farm-fresh, ingredients. *Cough* What?? :)

I actually made homemade pizzas the other day, and used about 1/4 C. of Alfredo for one pizza, and 1/4 C. of spaghetti sauce for another, so I had these in my fridge and they needed to be used...because I am not one to waste food. *Cough* What??? :)


Here is what I used: Pre-cooked meatballs, 1 jar of spaghetti sauce, 1 jar of Alfredo sauce, and 1/2-pkg (about 8oz.) of spaghetti noodles. And you will notice I DID use whole wheat noodles, so you can curb your judgements a little..because now this is healthy. *Cough* What???

Step 1: Spray your crockpot with cooking spray.
Step 2: Add 1/2 of your spaghetti sauce, 1/2 your meatballs, and your noodles.


Step 3: Sprinkle with cheese.
Step 4: Add your Alfredo sauce
Step 5: Add remaining meatballs and spaghetti sauce
(Make sure you cover ALL of the noodles with sauce. I have a couple sticking up, and they were not soft)
Step 6: Top with remaining cheese.
Step 7: Cover and cook on LOW for 4 hours.


Voila!


Crockpot Spaghetti Casserole
PRINTABLE RECIPE

INGREDIENTS:
•1/2 package of pre-cooked frozen meatballs
•1 jar of spaghetti sauce
•1 jar of Alfredo sauce
•3 C. of cheese
•8 oz. of spaghetti noodles, broken into pieces

DIRECTIONS:
1.Spray your crockpot with non-stick cooking spray.
2.Pour 1/2 of spaghetti sauce and 1/2 of your meatballs in the crockpot.
3.Add all of broken spaghetti noodles.
4.Top with cheese.
5.Add jar of Alfredo next.
6.Add remaining meatballs and spaghetti sauce, making sure to completely cover the raw noodles.
7.Top with cheese.
8.Cook on LOW heat for 4 hours


--Amber

Mocha Frappe

Just so you know, I am under the impression that you cannot have too many coffee recipes to try. I have been playing around with different ingredients trying to make yummy coffee drinks to replace the expensive ones at the coffee shop. (Even though I will STILL buy them from the coffee shop, but only for a special treat vs. everyday.) I am a stay-at-home mom/home medical transcriptionist. I want to save my hard earned money for more important things other than coffee...like make-up. Haha :)


Mocha Frappe

PRINTABLE RECIPE


  • 1/2 C. strongly brewed coffee, chilled (I use the Pioneer Woman's Iced Coffee recipe and always have some on hand in my fridge.)

  • 1/2 C. milk

  • 1 TBSP. instant vanilla pudding (You can use chocolate if you prefer.)

  • 1 TBSP. sweetened condensed milk

  • 1-1/2 C. ice cubes

  • 1 TBSP. chocolate syrup


    Put everything in the blender and blend until smooth!

    This is a starter recipe and is good on it's own, but you can always add whatever you like in your coffee. (For example: Coconut, banana, raspberry, almond flavoring, cinnamon, etc.)


    Enjoy!

    ---Amber

Monday, July 11, 2011

Diablo Cookies

I have discovered a new love...Cooking Channel TV! I just recently had oral surgery, so I had a lot of time to hang out and watch television. Of course, I felt the need to torture myself with food that I couldn't eat. One of my new favorite shows is called Eat Street.
It featured a food truck called TacoFino, and they made these cookies called Diablo cookies.

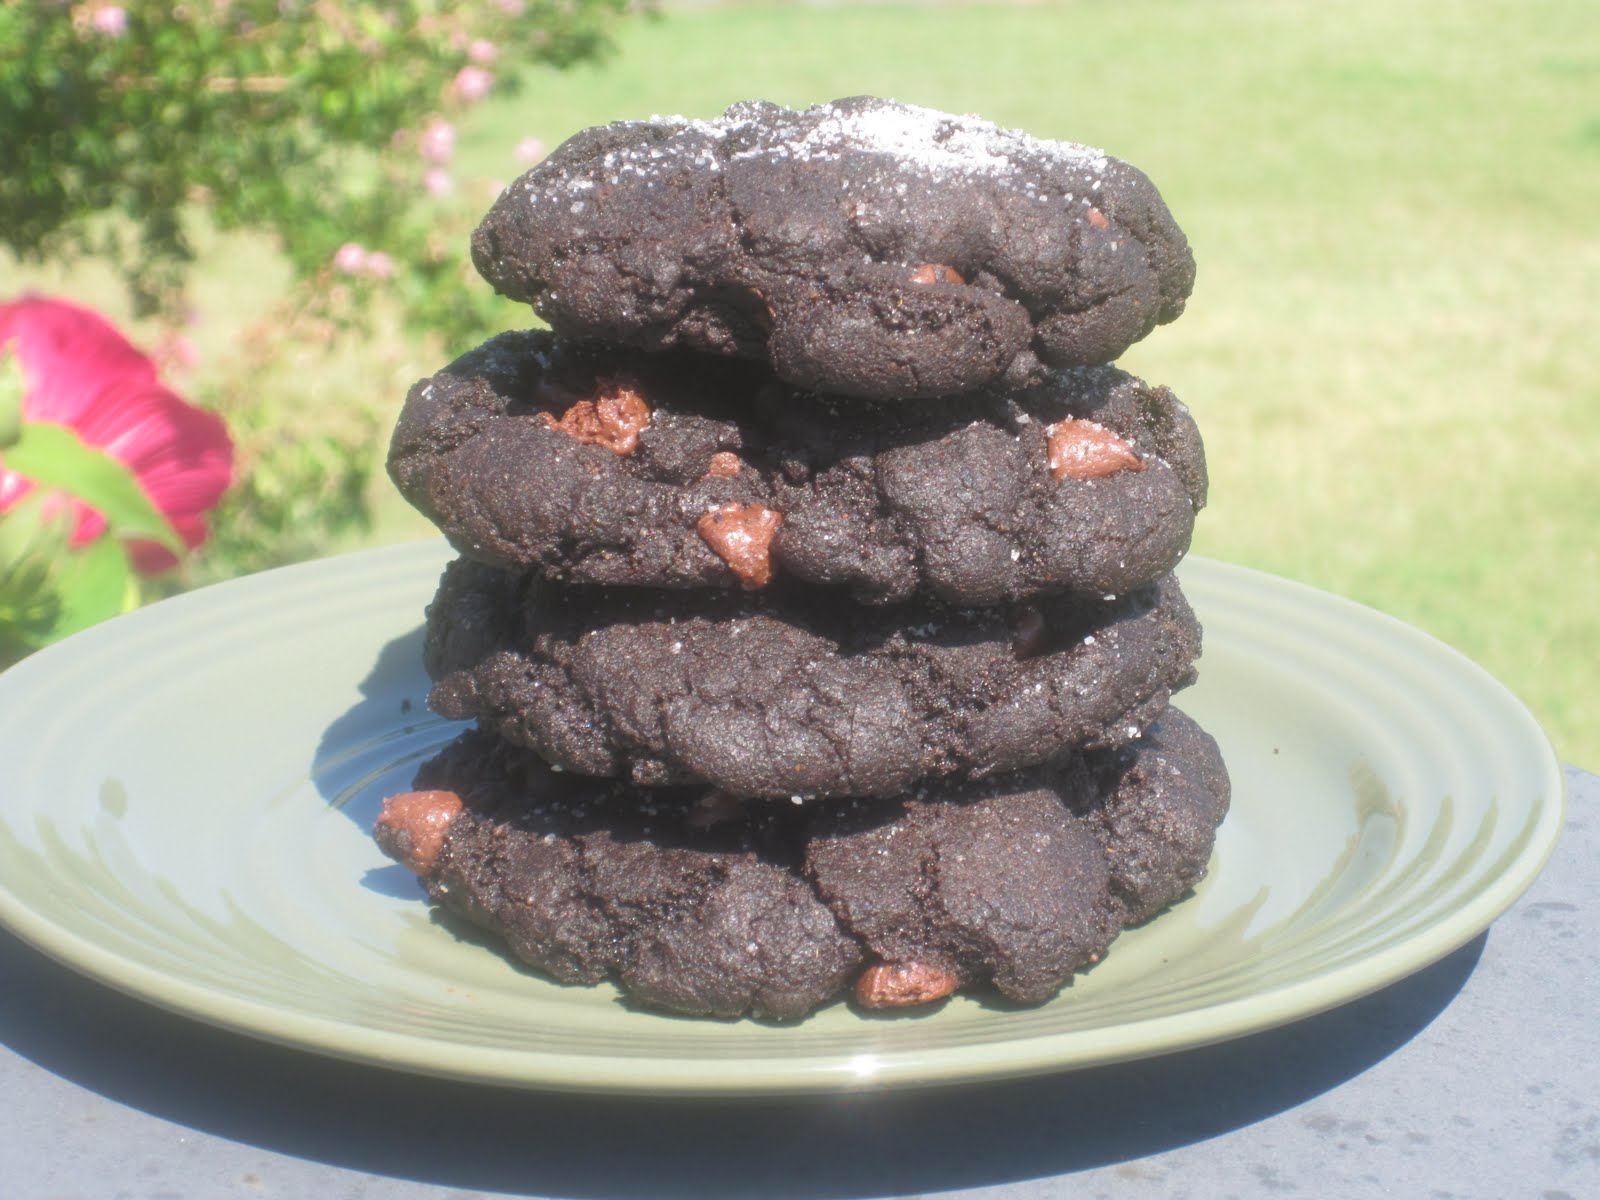
These cookies are a brownie-type cookie with a crisp exterior, and a fudgy interior. They have the combination of chocolate and cayenne pepper which makes them interesting, and a sprinkling of sea salt.. which cannot be left out! The salt really brings out the chocolaty goodness!

My kids ate them up surprisingly! Addison said, "YUM mom, these are good, but spicy.. can I have another one??" She's 3, so if she can handle it, so can you! Go ahead, I know you've been feeling devilish!:)

Diablo Cookies

PRINTABLE RECIPE


INGREDIENTS:

•1 cup brown sugar
•1 cup white sugar
•3/4 cup vegetable oil
•2 eggs
•1/2 tsp. ground ginger
•1 Tbsp. vanilla extract
•1-1/2 cups of flour
•1 cup of dark chocolate cocoa powder
•1 tsp. baking soda
•1 tsp. cinnamon
•1 tsp. cayenne pepper
•1 cup chocolate chips
•white sugar
•sea salt


DIRECTIONS:

1. Preheat the oven to 375 degrees.
2. In a large mixing bowl, mix together the brown sugar, white sugar, vegetable oil, eggs, ginger, and vanilla.
3. In a separate bowl, mix together your dry ingredients: flour, cocoa powder, baking soda, cinnamon, and
cayenne pepper.
4. Add the dry ingredients to the wet ingredients and mix until incorporated. This mixture will be a brownie-type mixture and very thick.
5. Fold in the chocolate chips.
6. Form dough into balls and flatten onto a baking stone or a greased cookie sheet
7. Sprinkle with white sugar and sea salt.
8. Bake for 10-12 minutes, until cookies start to have a cracked appearance. You want the middle to remain fudgy.
9. Move to a cooling rack.
10. Enjoy!

Tuesday, July 5, 2011

Oh yes I CAN! :)

My mother-in-law came to visit the other day, and she brought us a huge basket of tomatoes. Of course, being a true Texan, I look at tomatoes and instantly see SALSA! :) I had never canned anything in my life before, so I started to scour the Internet for recipes and tips and tricks. I really couldn't find just one site that had all of the information, so I figured I would post this for you to show you how I did it!


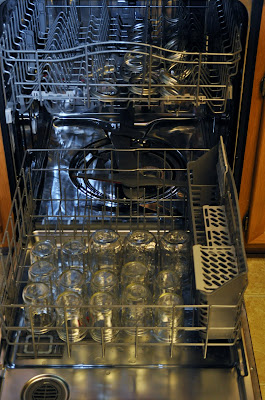
First things first.. SANITIZE all of your jars, lids, etc. My dishwasher has a Sanitize cycle. This cycle takes F.O.R.E.V.E.R., so do this first!

Next I washed all of my tomatoes. I didn't count, but this is how many I used.
Now take the tomatoes and cut an "X" in the bottom. This will make peeling the skins off super easy after you boil them.
Then you need to take out the stem. Just cut it out and don't get too fancy. It can be ugly.
NOW-- I do not have a picture of this step, but all you do next is put the tomatoes in a pot in water and boil them for a few minutes. You will see the skins start to loosen. It doesn't take too long, just a few minutes.


I made an ice bath to stick the tomatoes in to shock them into submission after I boiled and drained them. Once they were cool enough, I peeled off the skins and stuck them in a strainer and SQUISHED! I wanted to get out some of the juice and seeds so that my salsa wouldn't be too runny. You can always save your tomato juice for something else if you are frugal! ;)


I got out my food processor and chopped up all of the tomatoes next, along with all of the other ingredients. I added them to a stock pot on the stove and simmered for about 20 minutes, and then it was ready to add to the jars!


If you are going to can your salsa, this canning funnel is a must! Add your salsa to the jars, leaving about 1/4-inch of head space along the top.

(See?? About 1/4-inch from the top of the jar.)
Take a plastic or wooden spoon end, and run it around the perimeter of the jar to insure that there are no bubbles. (Everything I read said NOT to use metal to do this. I am not sure why, but I am not going to ruin my salsa because I am curious.)
Wipe the rims clean and close them up. Don't tighten the jars too much, we want air to escape during the canning process; just "finger tip" tighten it. Put your cans in the canning rack and lower them into the pan of hot water.
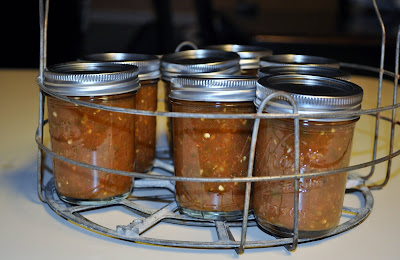
Make sure the water comes up to at least an inch over the top of the jars. Put the lid on the pan and simmer for 20-minutes.
Once you take the jars out of the stockpot, you will know that they are sealed if the button in the middle is pressed down. If you can press it up and down, it's not sealed properly!

TA-DA! And here is the fruit (or salsa) of my labor! :) It's way better than store bought salsa!

I used this spice packet to start out with. I used the "HOT" one, and it really wasn't very hot. At least not to me.


Here is the recipe I used:
About 25 tomatoes
6 jalapeno peppers (I seeded half of them. If you are a big wimp, seed them all.)
2 bunches of cilantro
10 garlic cloves
3 large onions
Mrs. Wages Hot Salsa spice mix
salt to taste
vinegar
(*** You have to add vinegar or citrus juice to the mixture to ensure that you have the right pH level for canning so that it will not spoil. I used vinegar because that is what the back of Mrs. Wages mix said, but next time, I will use lime juice. Lime juice belongs in salsa better than vinegar does, but feel free to use what you want!)

Thursday, May 26, 2011

Serrano Cilantro Cream Sauce

Have you guys ever had the chicken tacos from Buffalo Joe's? They are one of my favorite things to eat! And they really couldn't be any simpler: Grilled chicken, cheese, red onion, lettuce, corn tortilla. BUT... they serve them with a sauce called Serrano Cilantro Cream Sauce, and OMG! I want to bathe in that stuff. I seriously can put it on ANYTHING, so I figured I better figure out how to make it! I scoured the internet in search of recipes, but after trying this and that, I still didn't have the recipe... until now.
I think this is pretty close, and I am happy with the results!


Serrano Cilantro Cream Sauce

INGREDIENTS:
  • 1 bunch of cilantro
  • 5 small Serrano peppers, seeded
  • 5 garlic cloves
  • 1 cup Mexican Crema.
  • 1 tsp. garlic salt
  • salt & pepper, to taste.
DIRECTIONS:
Put everything in a food processor, blend, and enjoy!

This is so easy! You can put it on tacos, a salad, or even use it as a dip for chips!
(If you can't find Mexican Crema, you can use 1/2 c. sour cream and 1/2 c. heavy cream.)

Tuesday, April 26, 2011

Indoor S'mores made with leftover Easter candy!

***No actual Bunnies or Chicks were harmed in the making of this recipe!*** :)

We had a great Easter this year, but the Easter Bunny brought TOO MUCH CANDY!! We can also thank my sister Heather, as usual, who hid 220 candy filled eggs! :) Since the girls were so sugared up on Sunday, I decided to put up the extra candy, and I have been just giving them a little here and there. There is no way that I am giving them a whole chocolate bunny again though. Addison had one from Nannie, and she was bouncing off the walls and talking so fast, I had a hard time understanding her!

So, it got me thinking... what to do with all of this candy? I mean, I guess I could just take the easy way out and throw it away, but that would be such a shame. (I DID throw away all of the fruity, taffy candies though....'cause they ain't chocolate!) And then of course, I could just sit around and eat it, but I like to make things more complicated than that!
How about something a little more creative?? Well, my friend Amber posted a recipe on her blog, Lotus & Honey, not too long ago and I thought I would give it a try, but instead of using the regular ingredients, I used Easter Candy--Chocolate bunnies and Peeps!

Here is what you will need. You can use a variation of this.. whatever chocolate candies you have will work. If you have a gazillion individually wrapped ones, well unwrap them and let's get started. Just make sure you have marshmallows and chocolate.
Step 1: Melt the butter in a LARGE pot on the stove. (You will be adding a whole box of cereal to this later, so make sure you pot is big enough.)
Step 2: While your butter is melting, chop up about 5-6 Peeps, and set aside.
Step 3: Throw the rest of your Peeps into the melted butter and stir until they are melted.
Step 4: Add your 12 oz. box of Golden Grahams, stirring well so that all of the cereal gets coated in the marshmallow/butter mixture.
Step 5: Pour the mixture into a greased 9x13 dish. Press down the cereal using parchment paper to keep your hands from getting sticky. (Thank you Amber for that tip!)
This is what it should look like. It is tinted a little pink because of the Peeps we used.
Step 6: Sprinkle the reserved Peeps to the top.
Step 7: Chop up all the chocolate you are using and put in a bowl to melt. (You can use a double broiler if you have one, but I don't.) Melt the chocolate in the microwave 30 seconds at a time until completely melted.
Step 8: Pour the chocolate over the cereal mixture and wait until it hardens.
Step 9: Gobble it up! These are way better than traditional S'mores!

And of course, here are a few pics of the girls while they were anxiously waiting for the chocolate to cool.
I love this picture :)
Addison said, "Shhhh! Keep your voices down while I am on the phone!" Guess she's heard THAT a few times!

Hope you guys enjoy this recipe!


Indoor S'mores


INGREDIENTS:
  • 8 TBSP Butter
  • 12 oz box of Golden Graham cereal
  • 10.5 oz bag of mini marshmallows, 1-1/4 cup reserved. (I used 15 Peeps, 5 reserved.)
  • 23 oz bag of chocolate chips (I used 3 chocolate bunnies.
DIRECTIONS:
  • Step 1: Melt 8 TBSP of butter in a large pot. (You will be adding a 12 oz box of cereal to this, so make sure there is enough room!)
  • Step 2: Chop up your reserved Peeps, if you are not using mini marshmallows.
  • Step 3: Add your marshmallows, all but the reserved 1-1/4 cup.
  • Step 4: Add your 12 oz. box of Golden Grahams, stirring well so that all of the cereal gets coated in the marshmallow/butter mixture.
  • Step 5: Pour the mixture into a greased 9x13 dish. Press down the cereal using parchment paper to keep your hands from getting sticky
  • Step 6: Sprinkle the reserved Peeps to the top.
  • Step 7: Chop up all the chocolate you are using and put in a bowl to melt. (You can use a double broiler if you have one, but I don't.) Melt the chocolate in the microwave 30 seconds at a time until completely melted.
  • Step 8: Pour the chocolate over the cereal mixture.
  • Step 9: Gobble it up! These are way better than traditional S'mores!


Friday, April 1, 2011

Mongolian Stir-Fry

I should call this recipe "Ode to Genghis Grill"! I went to eat there last night, and it was SO GOOD! We don't have anything like that where I live, so I decided I was going to try to make a recipe of my own to eat at home. It was either that, or travel for 2-hours a couple of times a week to get my fix! :) I went to the store today and bought up a ton of Asian sauces and fixings, and started my taste testing! I found the perfect recipe!
I prefer the spicy recipe. I did make a mild recipe with no heat so that I can feed my kids too...And of course so that all of the wimpy people out there won't whine. :)

Sauce for the Spicy folks:
Wimpy sauce for kids and whiners:
Add all of the proteins and veggies of your choice in a wok. You can mix this up however you want. Add whatever you want, or don't add it. It's totally up to you, which makes this an awesome dish!

After you cook all of your meats and veggies all the way through, you can add your pasta. Now you would of course use Udon noodles...but sadly, here in a small town, there are not any to be found, so I used linguine. It got the job done. You could add brown rice or white rice if you would prefer.
Now after this step, I split the mixture into two batches and added the mild sauce to the first batch for the kids and my grandmother. After I finished cooking theirs and putting it into a dish, I put the other half of the mixture into the wok and added the spicy mixture.
Gotta please everyone!
Hope you all enjoy this recipe as much as I do! I can officially say that I am in LOVE.

Feel free to send me your love letters :)

SAUCE:

Spicy Sauce
  • 2 Tbsp. soy sauce
  • 2 Tbsp. rice wine vinegar
  • 1 tsp. hoisin sauce
  • 2 tsp. chile-garlic sauce
  • 1 tsp. Mongolian fire oil
Mild Sauce
  • 2 Tbsp. soy sauce
  • 1 Tbsp. rice wine vinegar
  • 1 tsp. hoisin sauce
  • 1 tsp. sesame oil
PROTEIN:
  • 1/2 lb, smoked sausage, sliced
  • 4 chicken breasts, cut into small cubes
  • 8 oz. peeled, deveined shrimp
VEGETABLE:
  • Red bell pepper
  • Green bell pepper
  • scallions
  • cilantro
  • broccoli
STARCH:
  • 1/2 lb linguine noodles

DIRECTIONS:
  1. Boil linguine noodles according to the package directions.
  2. Prepare the sauce of your choice in a small bowl, and set aside.
  3. Cut up all of your protein and vegetables.
  4. In a large skillet or wok, add about 1 tsp. of sesame oil, and then add your proteins and vegetables. Cook until everything is completely done.
  5. Drain your noodles and add them to your wok.
  6. Add your sauce and stir everything together just until sauce is heated through.
  7. Enjoy!